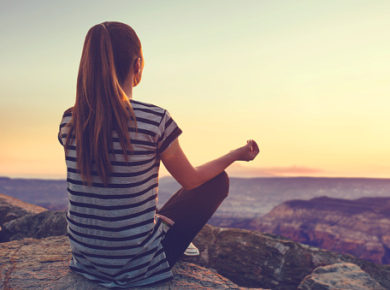
5 Advanced Yoga Poses You Must Do

If you’ve mastered the basics of yoga, there’s a chance you may be thrilled to broaden your horizons and incorporate some more advanced poses into your practice. To help you get started, we at UnCrushedLeaves Store have come up with 5 must-do advanced yoga poses for daily practitioners who want to add challenging asanas to their yoga routine.
The need of doing advanced yoga poses is to get more body flexibility, balance, and strength. It also enhances proper blood circulation and coordination of different organs.
At UnCrushedLeaves Store we always request the learners to practice yoga under the guidance of Yoga Gurus. UnCrushedLeaves Store provides an opportunity to explore Yoga through online Yoga Classes conducted by certified instructors. Explore more now
Best 5 must-do advanced yoga poses
1. Crow Pose (Bakasana)
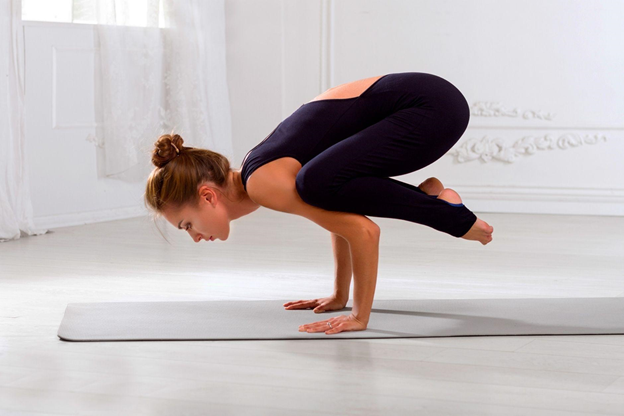
Crow pose is also known as crane pose – is usually the first arm balance learned by yoga students which offers you an opportunity to feel both strong and flexible. It encourages toning in the abs and the arms, strengthening in the core, and improving focus in the mind.
Benefits
- Strengths arms and wrists.
- Opens the groins.
- Stretches the upper back.
- Strengths the abdominal muscles.
- Tones the abdominal organs.
- Improves your core strength.
How to do it
- Come into a low squat with feet hip-width apart, heels lifted, and elbows on the inside of your knees.
- Slowly lean forward by placing your hands on the floor in front of you, shoulder-width apart.
- Keep your chin slightly forward. Bend your arms in a way that they make a 90-degree angle, push your hands into the floor and tilt your hips up. Here, your feet will start wanting to come off the ground.
- Lift one foot slowly and maintain the lift in the hips and the engagement of the core and arms.
- Once you have balanced on one foot raised, raise the other slowly. Hold your eye focus on the floor in front of you and keep the 90-degree bend in your elbows. Remember to keep sending the hips up.
- Hold for five full breaths and exit by placing your feet down and returning to the low squat.
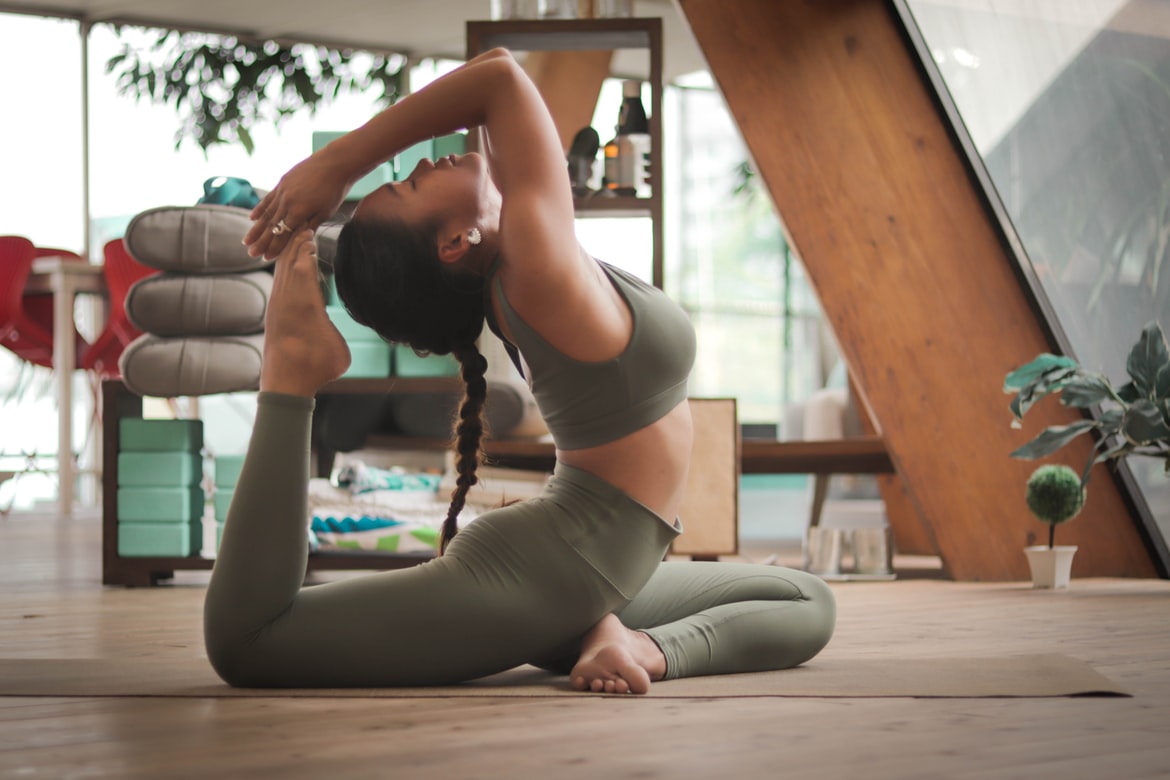
2. Lotus Pose (Padmasana)

Lotus Pose requires open hips and consistent practice. This pose builds an essential foundation for meditation practice while helping to manage stress with a conscious stretch in the front of the thighs and ankles.
Benefits
- Calms down your brain.
- Stimulates the pelvis, spine, abdomen, and bladder.
- Stretches the ankles and knees.
- Traditional texts say that Padmasana eliminates all diseases and wakes up kundalini.
- Reduces menstrual discomfort and sciatica.
- Constant practice of this pose until late into pregnancy is said to help ease childbirth.
- Keeps the spine straight.
How to do it
- Sit down and extend your legs in front of you. Bring the right leg toward you, position the knee in your right elbow and the ankle in your left elbow.
- Try to grab opposite hands around your shin, and gently rock around here relaxing the hip.
- Bend your left leg out, like one-half of a cross-legged seat, with your right leg still in your arms.
- Take your right foot to your left hip, angled, pressing down into your groin. Hold for a moment.
- Lean forward and reach for your left shin, sliding your flexed left foot up and over to your right hip. Keep both feet flexed and active, rotating from the hips as opposed to the knees.
- Hold for a few breaths. Exit by taking your legs in your hands and bring them back to your original seat.
- Always practice crossing both legs each time.
3. Handstand Pose (Adho Mukha Vrksasana)
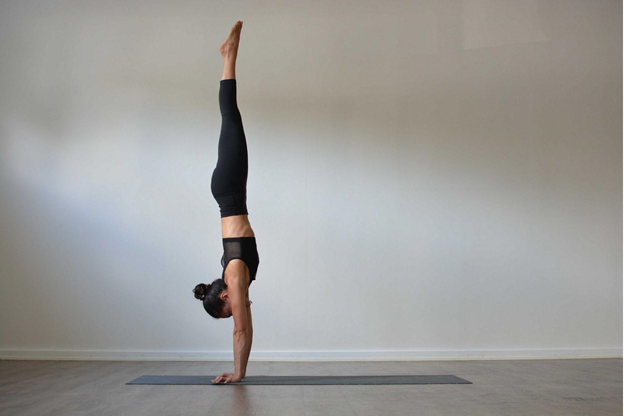
The handstand pose which is also called the downward-facing tree pose works to boost the body’s energy and build confidence in the mind. This is a glorified yoga pose as it is much about your core strength. This yoga targets your shoulders, wrists, arms, and balance of your body.
Benefits
- Helps in building upper body strength
- Strengthens core muscles
- Improves energy and mood
- Boosts circulation
- Increases balance and stability
- Improves postural and body awareness
How to do it
- Take a standing split position and place your palms onto the mat directly below your shoulders and look at the space between your hands.
- Stack the standing foot directly below your hip with a little bend in the knee.
- Engage your core and kick up with control, bringing the thigh up and into the hip socket to lead with the standing leg. Reach the lifted leg straight up and engage through your toes.
- Draw your legs together with your big toes touching and heels narrowly separated.
4. Monkey Pose (Hanumanasana)

Monkey Pose is an intense stretch normally referred to as the splits. In yoga, Monkey Pose is done with closed hips, while in gymnastics and cheerleading, splits are done with open hips. This alignment is subtle but quite different. It targets hamstrings, hips, and groin.
Benefits
- Strengthens and stretches your hamstrings, quads, and groin muscles
- Increases hip flexibility when practiced regularly
- Stretches the lower back muscles
How to do it
- Start from your knees, bring your right foot a foot in front of you, rotating the thigh out in a way you are putting weight on the outside edge of your right foot.
- Bend your upper body forward, pushing fingers into the floor. Start slipping your left knee back, straightening the left leg as you deepen the bend in your right knee.
- Once you learn that the left leg can’t go back much, start sending your right heel forward, internally rotating the leg so your right knee is facing the top. Find out if the top of the left thigh and the back of the right thigh get closer to the floor.
- Make sure both legs are in straight lines from the hips and the front heel is engaged, legs active.
- Bring your hands to prayer or reach your arms up above your head and hold for 30 seconds, or till you are comfortable. To exit, press hands into the floor, and bend the legs in and back to their original positions. Change and repeat on the other side.
If you are a beginner, you may want to look at the Top 5 Standing Yoga Asana for Beginners.
5. Scorpion Handstand (Vrschikasana B)
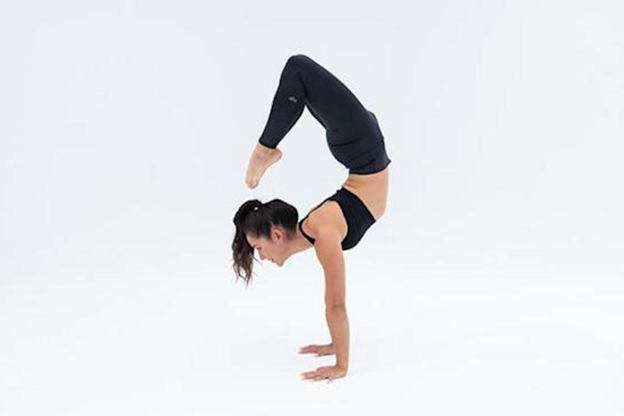
A scorpion handstand is an advanced balancing inversion that is a mixture of a basic handstand with a scorpion pose. It is an extremely challenging yet equally rewarding pose. It requires strength, flexibility, and balance. Adding a backbend to a handstand creates a beautiful pose that helps build strength in your arms and core while opening your heart and front body. This pose tests your balance, concentration, and confidence.
Benefits
- Stretches your front body and opens your heart
- Builds deep core strength
- Improves strength and stability in your upper body
- Enhances balance and coordination
How to do it
- Start with a handstand position with your legs together.
- Bend one knee while maintaining a straight leg overhead.
- Drop your chest and lift your head up and back to create a mini backbend while simultaneously shifting the toes of your bent leg toward your head.
- Now, bend the straight leg and bring your toes to touch. Reach both toes toward the ground as you continue to lift your head.
We suggest all yoga practitioners to enhance their practicing by adding these advanced poses to their routine for better and healthy living. Our earnest suggestion is to practice yoga with a qualified practitioner. UnCrushedLeaves Store provides an opportunity to explore Yoga through online Yoga Classes conducted by certified instructors. Explore more now.